
This day marks the beginning of our solstice days--the days of mourning and activity leading up to Winter Solstice and Lucia's death and birthdays. December 13 to the 22nd is a sacred time for our family. We use this time, each year it has gotten a little more extensive, to bring our family together with crafts, foods, activities and storytelling about solstice. Winter solstice is the time when the Earth Mother gives birth to the Sun. We balance our daughter Lucia's stillbirth against this idea--we hold of birth and darkness and light. In this way, I suppose, this time is one we look forward to as a family, while we also find it somewhat solemn and important. It is a celebration and an acknowledgment of the balance of nature and light and dark.
I will be sharing some of the crafts we are doing--every day we are planning something to lead up until solstice. I will try to do tutorials for most of the activities I have prepared.
Yesterday, marked the St. Lucy activity, which is to make a St. Lucy crown.
The traditional St. Lucy crown contains actual candles and is decorated with greens and lingonberries. The base looks like this. But the ladies dressed like Santka Lucia look like this:
 |
| I took this pictures from Answers.com |
My pictures were much lousier than I thought they were on the little screen. Mama needs a SLR camera. Santa, help a sistah out.
Alright, so here is the beginning part of the crown part. I cut a piece of 12"x12" wool felt diagonally, making it three inches wide.

I then took the remaining sections of the square, as well as one piece of 29 cent recycled craft felt and cut out some greenery.

I basically laid these out on the crown and began felting them together. Felting is a process of rapid movement with a very very sharp needle. The process kind of sews the fibers together. Generally, it is a little more difficult, though not at all difficult, to felt two previously felted pieces together. Just because they are harder and their fibers sewn, if you want to use that terminology. So, I used red roving to make ligonberries to help felt the entire crown. In this picture, you can see the roving, or raw uncarded wool, and the needle. The needle is extremely sharp, and I would recommend being an older kid before giving needlefelting as a hobby. I poke myself all the time and draw blood.

After the entire crown was felted and the leaves and ligonberries were not going anywhere, it was time to make the candles. In this picture, at about 10/11 o'clock you can see the multi-needle tool, which helps you felt a larger area. Basically, you are sculpting while you are punching, the roving, which is as light and airy as it looks, becomes dense and hard.

I am sharing this video, because when I felt, this is what Thor does next to me, like I am dancing. But it is a good representation of what is happening.
Now, I needed to start the candles. I decided to make three. Again, I started with white wool felt. I decided to roll it.

After felting an inside roll, I wanted to add the flame.
I pulled yellow, red and orange roving and carded it together.
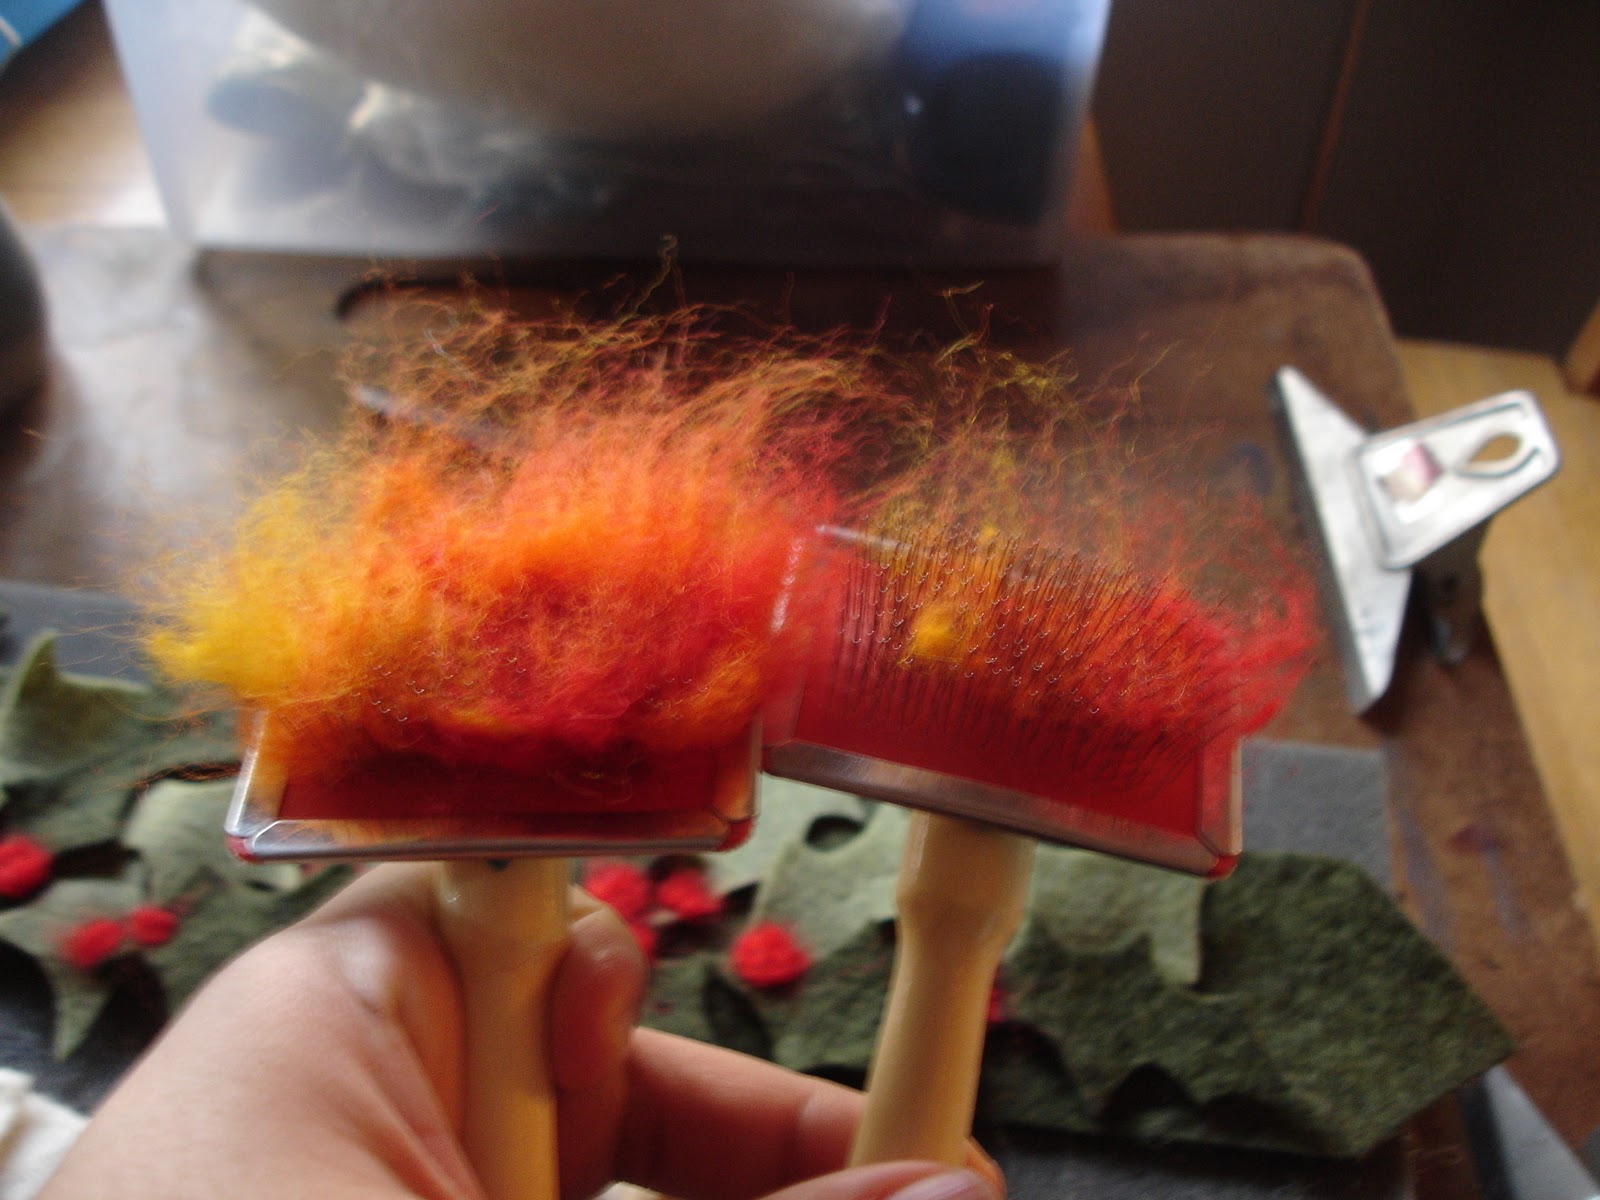
I did a very minimal needle felt, which is like a few punches just to give it some structure, but I did want it to look like a wild flame.
I added the "flame" to the inside of the candle, then rolled it, punched the outside of the candle, and eh, voila.

Then, I had to felt them to the crown. Since the pictures from yesterday got progressively worse, I took some this morning on the floor of my studio. (Staying classy!) This is the back of the crown and where you felt the candles onto the base. You can also see what the back of felt looks like.

The semi-finished crown looks like this.

I have yet to go buy some ribbon to tie the crown on in the back, because Beezus cried in the car in the parking lot of Joann's afterschool. She was thirsty, so I went home instead. But I forced her to balance it on her head for a picture. (Ignore the studio mess.)

I will take some pictures of Beezus dressed up in the full outfit tonight.
3 comments:
Love Beezus's St. Lucia crown, & your approach to this time of year. I am 1/4 Swedish & while I grew up hearing about St. Lucia Day, I'd never actually seen a Lucia pageant until I came to Toronto. There is an annual Swedish Christmas Fair here every November. Sadly, I've only ever been once, when we were first married (would love to go back again some year) -- but the Lucia pageant was quite something to see -- they used REAL CANDLES in the hair wreath. Kind of scary, but also beautiful to see.
Oh, I love it! That is a gorgeous crown and Beezus looks perfect in it. I am going to add this to our list for next year.
I love it and I'm so intrigued by needle felting.
Post a Comment